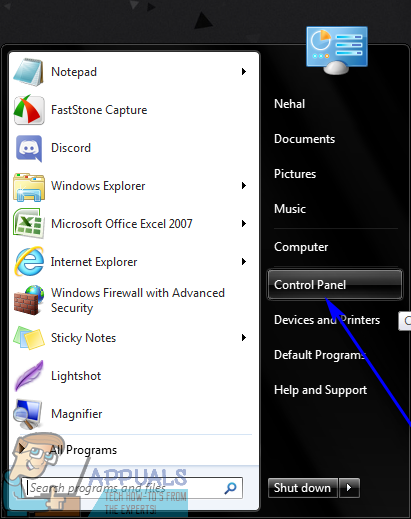
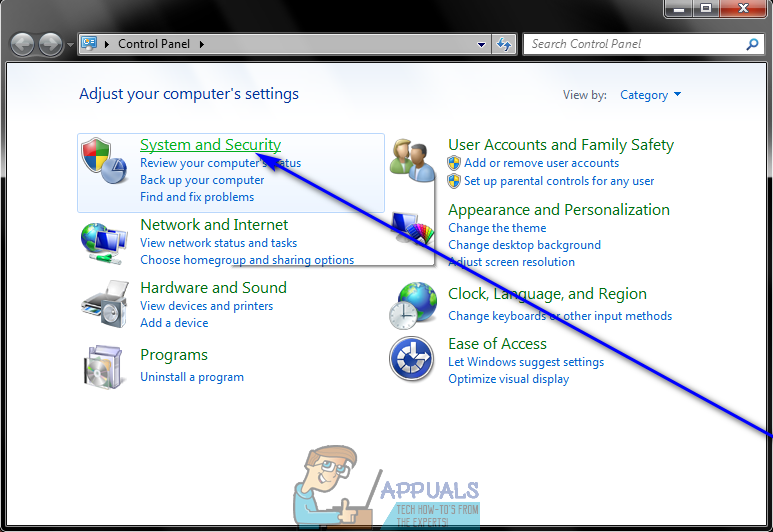
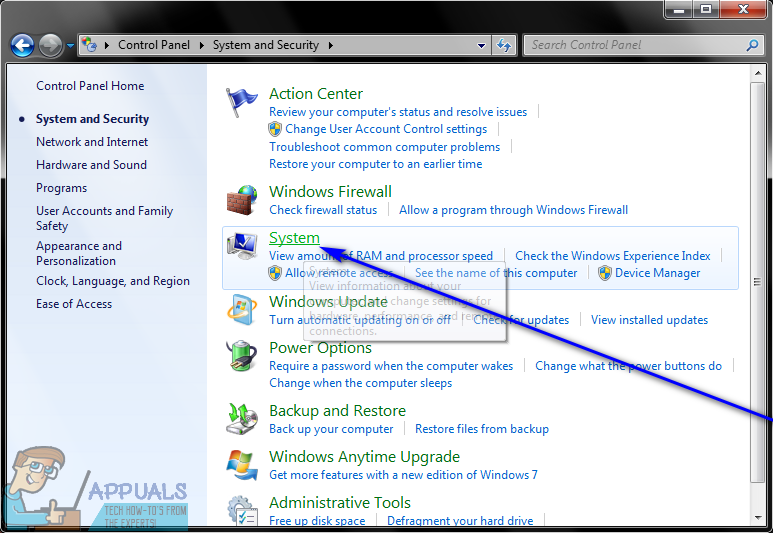
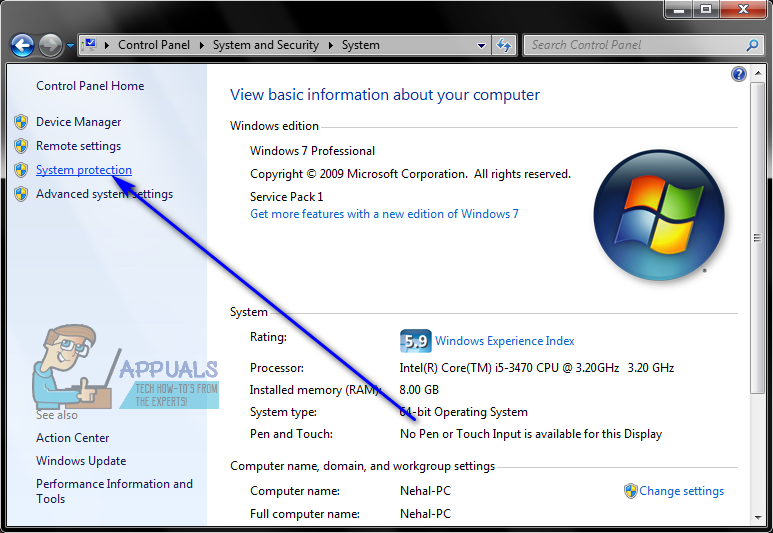
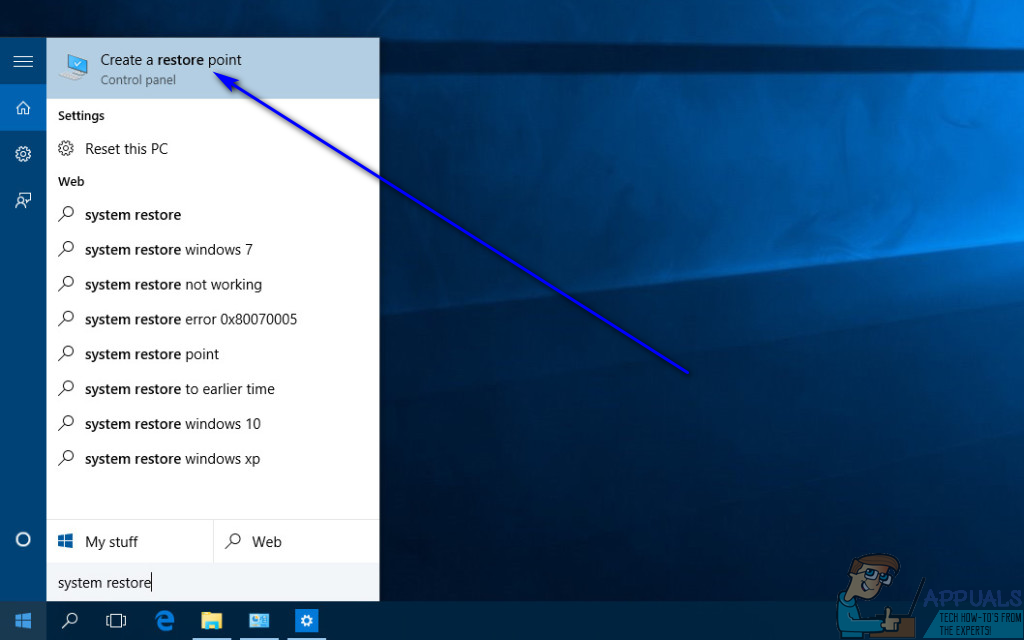
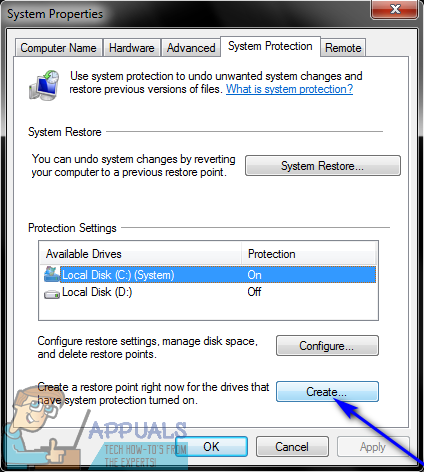
If something goes wrong with your computer or you start experiencing some kind of problem that you can’t seem to resolve, this is where System Restore comes in handy – you can simply use the feature to revert your computer to the exact way it was at an earlier point in time. Windows creates System Restore points by itself at regular intervals (provided that you haven’t tampered with this feature of the Operating System). However, you can also create a System Restore point manually, of your own accord, whenever you want. This is not only possible but also pretty simple and straightforward on all versions of the Windows Operating System. If you would like to manually create a System Restore point in a Windows computer, you need to get into the System Properties window. The steps you need to go through in order to get to the System Properties window vary depending on what version of the Windows Operating System you’re using:
On Windows 7
Windows 8 and 8.1
On Windows 10
Once you are in the System Properties window, you can go ahead and actually create a System Restore point. To create a System Restore point once you are at the System Properties window, you need to: Once the System Restore point has been successfully created, you can do away with all of the dialog boxes and windows that are open.
Fix: System Restore Failed to Extract the File from the Restore PointHow to Fix System Restore Point Error Code 0x80042308 on Windows 10?Fix: To use System Restore, you must specify which Windows Installation to…Fix: Error 0x8007025d While Restoring to a Restore Point on Windows 10
